windows内置的linux安卓驱动多系统摆脱虚拟机(上)
一、开始前的准备1.更新Windows版本
kali Linux官方发布了一个适用于WSL2 win10子系统的软件win-kex,这是一个运行在win10下的Linux GUI软件,从此win10也可以和Linux友好共存了
首先,打开Windows设置,选择更新和安全

找到OS内部版本信息
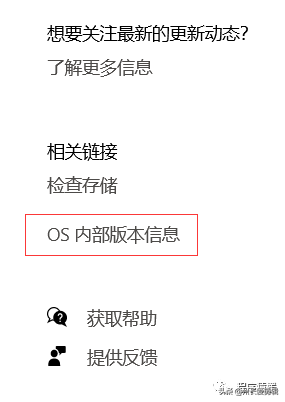
在Windows规格中找到版本号

版本号低于2004的需要进行更新。
直接在Windows更新中,更新至最新版本即可。
2.开启Windows功能
回到设置页面,找到应用

选择程序与功能

启用和关闭Windows功能
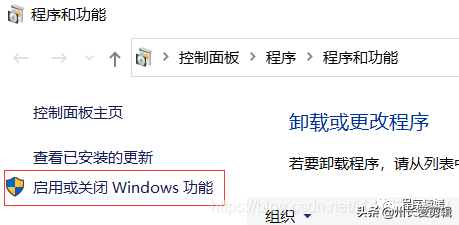
勾选适用于Linux的Windows子系统和虚拟机平台,确定。

稍等后重启计算机即可。
二、Linux子系统的安装1.下载WSL
进入微软商店
搜索Linux,并选择下载kali Linux
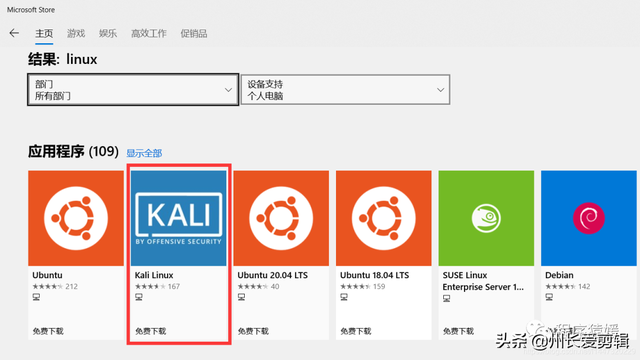
等待下载完成后点击启动,首次启动需要较长等待
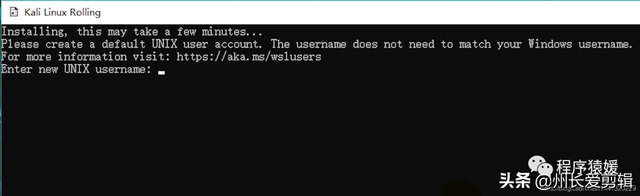
一直点回车也可以,以后每次打开不要密码而且是root用户
2.WSL版本转换
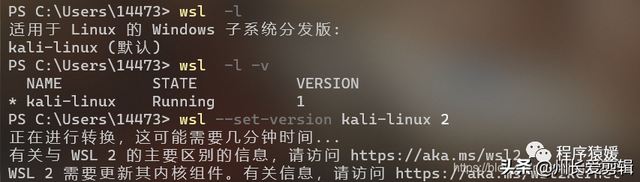
一般情况下我们安装的子系统都是基于WSL1的,而想要启动图形化的GUI界面我们需要将其转化为WSL2版本,方法很简单,进入cmd命令行或者power shell,输入命令
wsl -l -v
即可查看当前版本和子系统名称,输入命令
wsl --set-version kali-linux 2
(看你,这个wsl2是与虚拟机模拟器啥都不兼容,但是vmare现在兼容了,大多数安卓模拟器不支持,但是以后的wsa是基于wsl所以不用太担心)

稍等即可将版本转化为WSL2,但是有的时候装换会失败,并要求我们访问微软官网
https://docs.microsoft.com/zh-cn/windows/wsl/wsl2-kernel
这种情况一般是因为缺少WSL2 Linux内核导致的,只要访问该网站并下载安装相应的内核文件即可解决。
网卡的兄弟关注公v:cxyy1106,发送wsl留言解答

该文件为.msi文件,需要信任后安装(微软官方软件还会报警告就很搞笑)
安装完成后重新执行转换命令,如果还是转换失败可使用
wsl --set-default-version 2
默认安装版本改为WSL2,然后卸载已安装的Linux子系统,重新安装即可。
3.配置软件源
Linux系统的官方软件源在国外,直接使用命令进行下载时会非常慢,所以一般会使用源镜像进行下载,详细教程可自行搜索,我在这里仅提供一种简单的方法。
直接执行以下命令即可(这里我选用了北京外国语大学的镜像)
sudo sed -i 's/http.kali.org/mirrors.bfsu.edu.cn/g' /etc/apt/sources.list
sudo apt update && sudo apt upgrade
觉得不太行的后面还有几个
首先先查看kali中源的文件,里面默认有官方的源。

(vim没有vi也有)
控制文件要先按esc
dd删除一行
:wq保存退出
然后把我们找到的国内的源添加上,将官方的源进行注释。(在前面加“#”)。下面为国内及国外的源。
# kali官方源
deb http://http.kali.org/ moto main non-free contrib
deb-src http://http.kali.org/ moto main non-free contrib
deb http://security.kali.org/ moto/updates main contrib non-free
deb-src http://security.kali.org/ moto/updates main contrib non-free
#中科大kali源
deb http://mirrors.ustc.edu.cn/kali kali main non-free contrib
deb-src http://mirrors.ustc.edu.cn/kali kali main non-free contrib
deb http://mirrors.ustc.edu.cn/kali-security kali/updates main contrib non-free
#新加坡kali源
deb http://mirror.nus.edu.sg/kali/kali/ kali main non-free contrib
deb-src http://mirror.nus.edu.sg/kali/kali/ kali main non-free contrib
deb http://security.kali.org/kali-security kali/updates main contrib non-free
deb http://mirror.nus.edu.sg/kali/kali-security kali/updates main contrib non-free
deb-src http://mirror.nus.edu.sg/kali/kali-security kali/updates main contrib non-free
#阿里云kali源
deb http://mirrors.aliyun.com/kali kali main non-free contrib
deb-src http://mirrors.aliyun.com/kali kali main non-free contrib
deb http://mirrors.aliyun.com/kali-security kali/updates main contrib non-free
#163 Kali源
deb http://mirrors.163.com/debian wheezy main non-free contrib
deb-src http://mirrors.163.com/debian wheezy main non-free contrib
deb http://mirrors.163.com/debian wheezy-proposed-updates main non-free contrib
deb-src http://mirrors.163.com/debian wheezy-proposed-updates main non-free contrib
deb-src http://mirrors.163.com/debian-security wheezy/updates main non-free contrib
deb http://mirrors.163.com/debian-security wheezy/updates main non-free contrib
#中科大
deb http://mirrors.ustc.edu.cn/kali kali-rolling main non-free contrib
deb-src http://mirrors.ustc.edu.cn/kali kali-rolling main non-free contrib
#浙大
deb http://mirrors.zju.edu.cn/kali kali-rolling main contrib non-free
deb-src http://mirrors.zju.edu.cn/kali kali-rolling main contrib non-free
#东软大学 (这个有点。。。)
deb http://mirrors.neusoft.edu.cn/kali kali-rolling/main non-free contrib
deb-src http://mirrors.neusoft.edu.cn/kali kali-rolling/main non-free contrib
#清华大学
deb http://mirrors.tuna.tsinghua.edu.cn/kali kali-rolling main contrib non-free
deb-src https://mirrors.tuna.tsinghua.edu.cn/kali kali-rolling main contrib non-free
有几个命令会在更新源中用到。
apt-get update:更新源列表。如果修改源列表或者想要进行同步刷新或添加新的源,应该执行上面的命令。
apt-get upgrade:该命令将尝试下载在apt服务器上具有更新的所有软件包,然后按下 “y”时安装它们。
apt-get dist-upgrade:该命令也是更新所有软件包。但是当upgrade更新时,如果依赖关系无法解决可能会报错或者停止,但是dist-upgrade命令可以自动解决依赖关系。因此dist-upgrade可能会更新不希望更新的软件,导致一些需要依赖旧包的软件无法运行。
所以,apt-get dist-upgrade慎用。一般使用 apt-get update && apt-get upgrade 可以保证系统的完整性。
然后进行清理。apt-get clean
重启即可。reboot
三、配置优化环境
以下步骤不影响图形化界面安装启动,是我建议的一个终端美化。
在微软商店中找到并安装Windows terminal
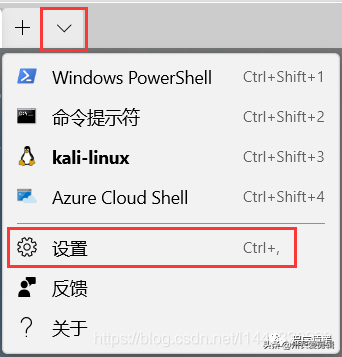
启动后在标签栏找到下三角图案,进入设置
Windows terminal的设置是基于.json文件实现的,如果没有适合的编辑器可以下载VSCode或者Sublime text
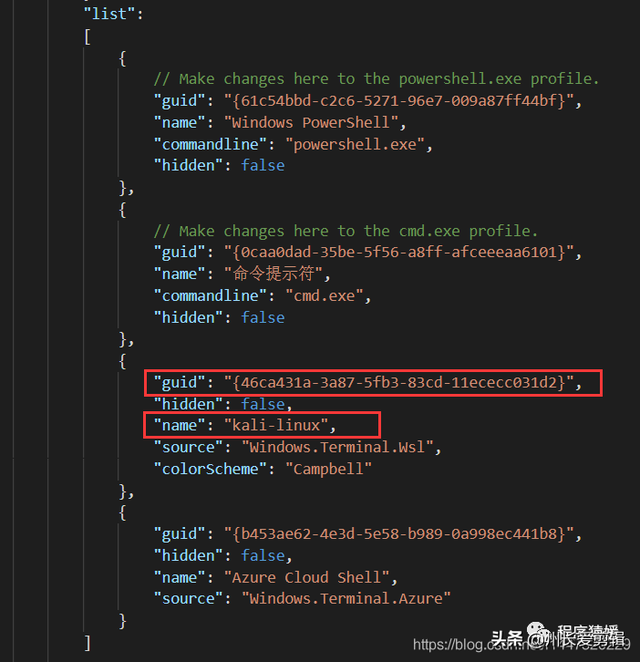
在list标签中找到name为kali-linux的标签,并复制guid(包括引号和括号)
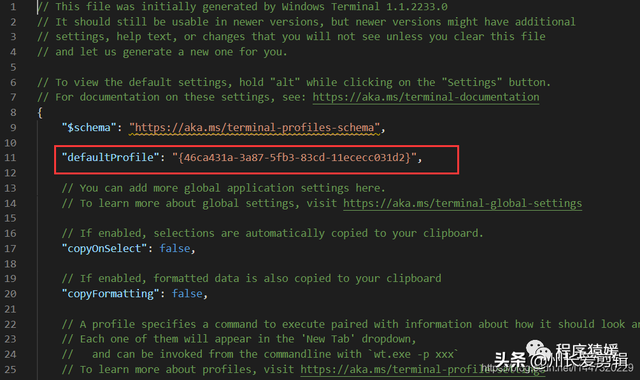
将刚刚复制的guid粘贴到文件开头的defaultProfile标签下,保存文件即可实现默认启动为Linux子系统
最新的软件可以图形化设置 不用打开这个文件
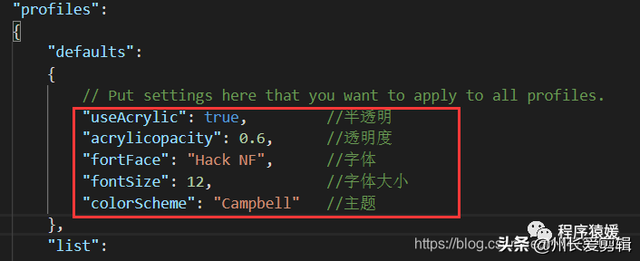
在schemes标签的方括号中可以添加各种主题颜色,课自行搜索获得,我在这里仅提供我自己正在使用的一种配色(设置好主题后,记得将profiles中的主题名称对应修改)
顺便贴下笔者的Windows Terminal配置:
// This file was initially generated by Windows Terminal 1.4.3243.0// It should still be usable in newer versions, but newer versions might have additional// settings, help text, or changes that you will not see unless you clear this file// and let us generate a new one for you.// To view the default settings, hold "alt" while clicking on the "Settings" button.// For documentation on these settings, see: https://aka.ms/terminal-documentation{ "$schema": "https://aka.ms/terminal-profiles-schema", "defaultProfile": "{61c54bbd-c2c6-5271-96e7-009a87ff44bf}", // You can add more global application settings here. // To learn more about global settings, visit https://aka.ms/terminal-global-settings // If enabled, selections are automatically copied to your clipboard. "copyOnSelect": true, // If enabled, formatted data is also copied to your clipboard "copyFormatting": false, // A profile specifies a command to execute paired with information about how it should look and feel. // Each one of them will appear in the 'New Tab' dropdown, // and can be invoked from the commandline with `wt.exe -p xxx` // To learn more about profiles, visit https://aka.ms/terminal-profile-settings "profiles": { "defaults": { // Put settings here that you want to apply to all profiles. "fontFace": "Fira Code", "fontSize": 11, "startingDirectory": "./" }, "list": [ { // Make changes here to the powershell.exe profile. "guid": "{61c54bbd-c2c6-5271-96e7-009a87ff44bf}", "name": "Windows PowerShell", "commandline": "powershell.exe", "hidden": false, "useAcrylic" : true, "acrylicOpacity" : 0.75, "colorScheme" : "Afterglow" }, { // Make changes here to the cmd.exe profile. "guid": "{0caa0dad-35be-5f56-a8ff-afceeeaa6101}", "name": "Command Prompt", "commandline": "cmd.exe", "hidden": false, "useAcrylic" : true, "acrylicOpacity" : 0.75, }, { "guid": "{b453ae62-4e3d-5e58-b989-0a998ec441b8}", // "hidden": false, "hidden": true, "name": "Azure Cloud Shell", "source": "Windows.Terminal.Azure" }, { "guid": "{07b52e3e-de2c-5db4-bd2d-ba144ed6c273}", "hidden": false, "name": "Ubuntu-20.04", "source": "Windows.Terminal.Wsl" }, { "guid": "{2c4de342-38b7-51cf-b940-2309a097f518}", "hidden": false, "name": "Ubuntu", "source": "Windows.Terminal.Wsl", "useAcrylic" : true, "acrylicOpacity" : 0.75, "colorScheme" : "ubt" } ] }, // Add custom color schemes to this array. // To learn more about color schemes, visit https://aka.ms/terminal-color-schemes "schemes": [ { "name": "Afterglow", "black": "#151515", "red": "#ac4142", "green": "#7e8e50", "yellow": "#e5b567", "blue": "#6c99bb", "purple": "#9f4e85", "cyan": "#7dd6cf", "white": "#d0d0d0", "brightBlack": "#505050", "brightRed": "#ac4142", "brightGreen": "#7e8e50", "brightYellow": "#e5b567", "brightBlue": "#6c99bb", "brightPurple": "#9f4e85", "brightCyan": "#7dd6cf", "brightWhite": "#f5f5f5", "background": "#001c33", // "background": "#212121", "foreground": "#d0d0d0" }, { "name": "ubt", "black": "#151515", "red": "#ac4142", "green": "#7e8e50", "yellow": "#e5b567", "blue": "#6c99bb", "purple": "#9f4e85", "cyan": "#7dd6cf", "white": "#d0d0d0", "brightBlack": "#505050", "brightRed": "#ac4142", "brightGreen": "#7e8e50", "brightYellow": "#e5b567", "brightBlue": "#6c99bb", "brightPurple": "#9f4e85", "brightCyan": "#7dd6cf", "brightWhite": "#f5f5f5", //"background": "#2f0012", "background": "#212121", "foreground": "#d0d0d0" }, ], // Add custom actions and keybindings to this array. // To unbind a key combination from your defaults.json, set the command to "unbound". // To learn more about actions and keybindings, visit https://aka.ms/terminal-keybindings "actions": [ // Copy and paste are bound to Ctrl+Shift+C and Ctrl+Shift+V in your defaults.json. // These two lines additionally bind them to Ctrl+C and Ctrl+V. // To learn more about selection, visit https://aka.ms/terminal-selection { "command": {"action": "copy", "singleLine": false }, "keys": "ctrl+c" }, { "command": "paste", "keys": "ctrl+v" }, // Press Ctrl+Shift+F to open the search box { "command": "find", "keys": "ctrl+shift+f" }, // Press Alt+Shift+D to open a new pane. // - "split": "auto" makes this pane open in the direction that provides the most surface area. // - "splitMode": "duplicate" makes the new pane use the focused pane's profile. // To learn more about panes, visit https://aka.ms/terminal-panes { "command": { "action": "splitPane", "split": "auto", "splitMode": "duplicate" }, "keys": "alt+shift+d" } ]}
如果,你更习惯于使用Windows PS,但是你又觉得界面丑陋,这里有美化教程。 WPS美化 Windows Terminal也是微软开发的,微软出品,必属精品啊
参考文章
https://blog.csdn.net/l1447320229/article/details/108210760?ops_request_misc=%257B%2522request%255Fid%2522%253A%2522161486627316780271516282%2522%252C%2522scm%2522%253A%252220140713.130102334..%2522%257D&request_id=161486627316780271516282&biz_id=0


评论